
Switchere identity verification application consists of two parts: biometric step and document step. Verification usually takes up to 15 minutes. Let’s get started!
Identity verification on Switchere: Step-by-Step Tutorial
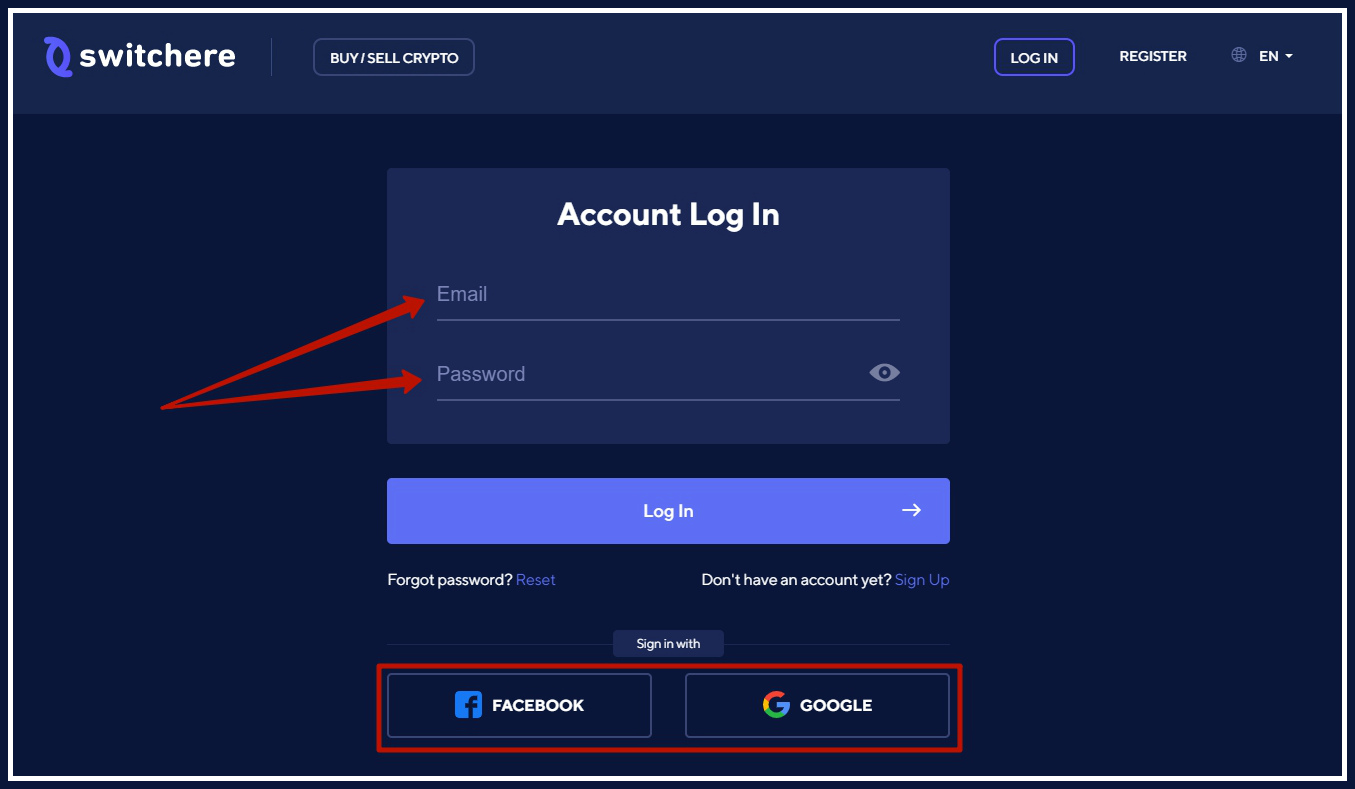
1. Visit our website at https://switchere.com/signin and Log In to account. In case you registered with Google or Facebook, you are welcome to use them for logging.
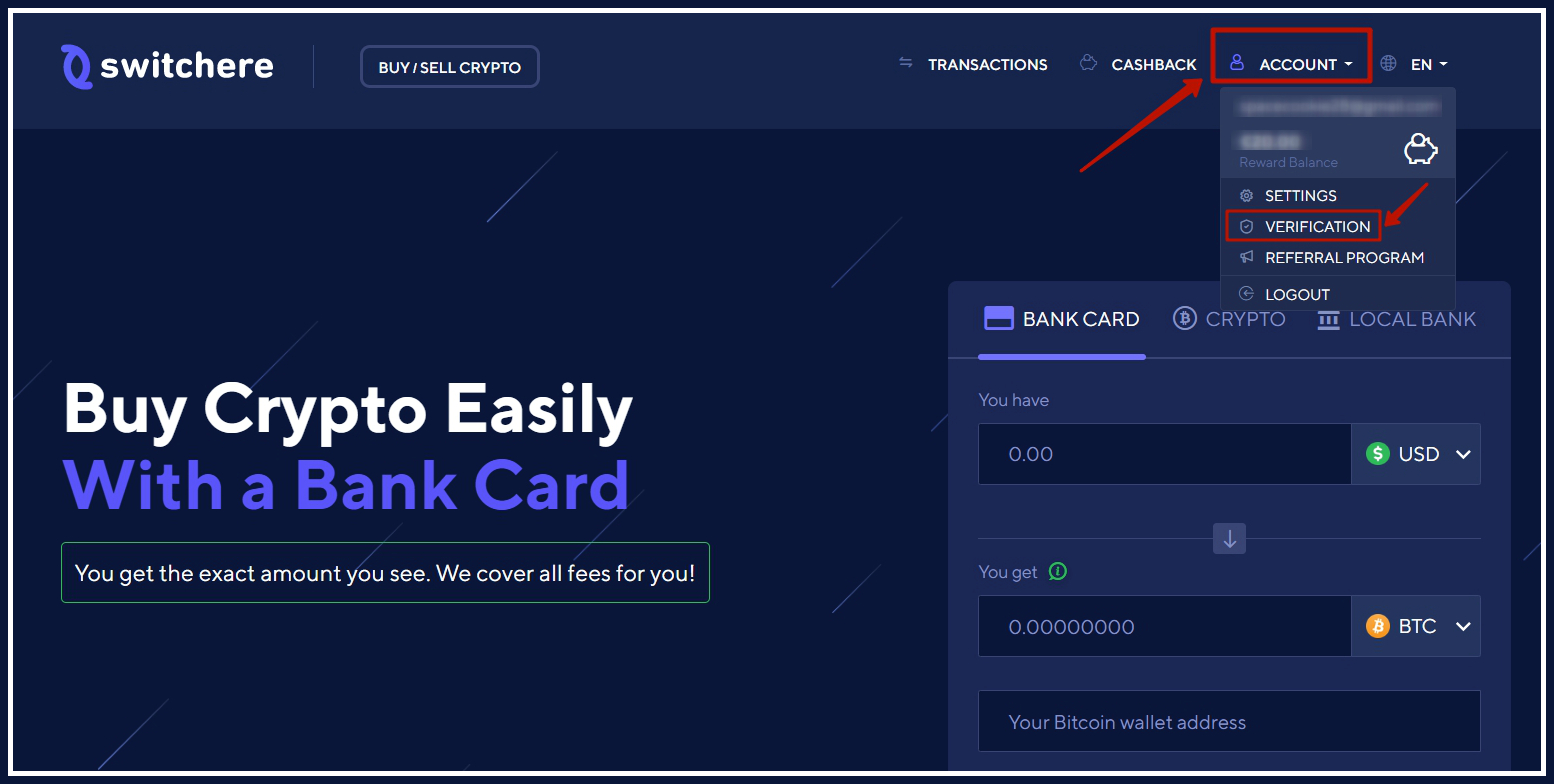
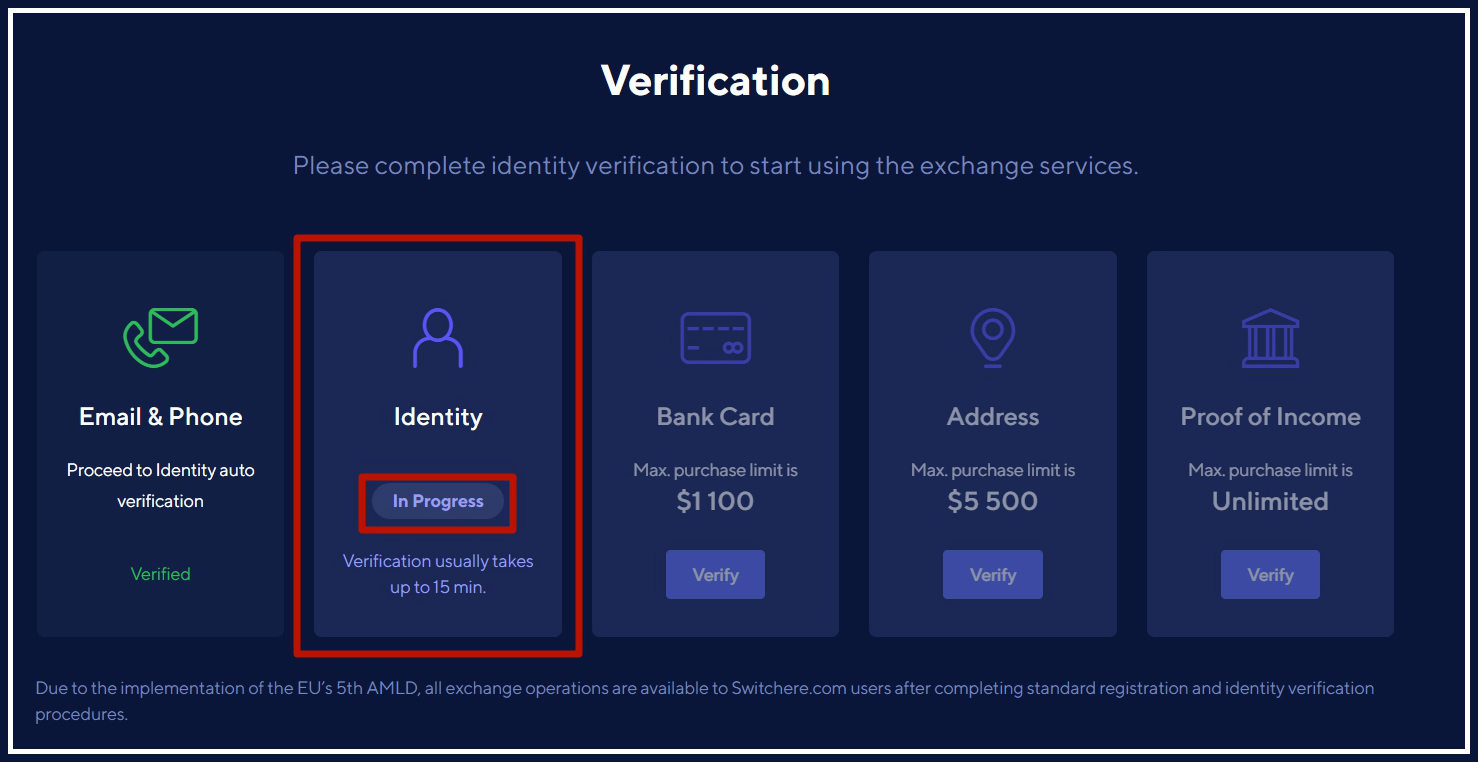
2. After clicking the “Account” button, click “Verification”.
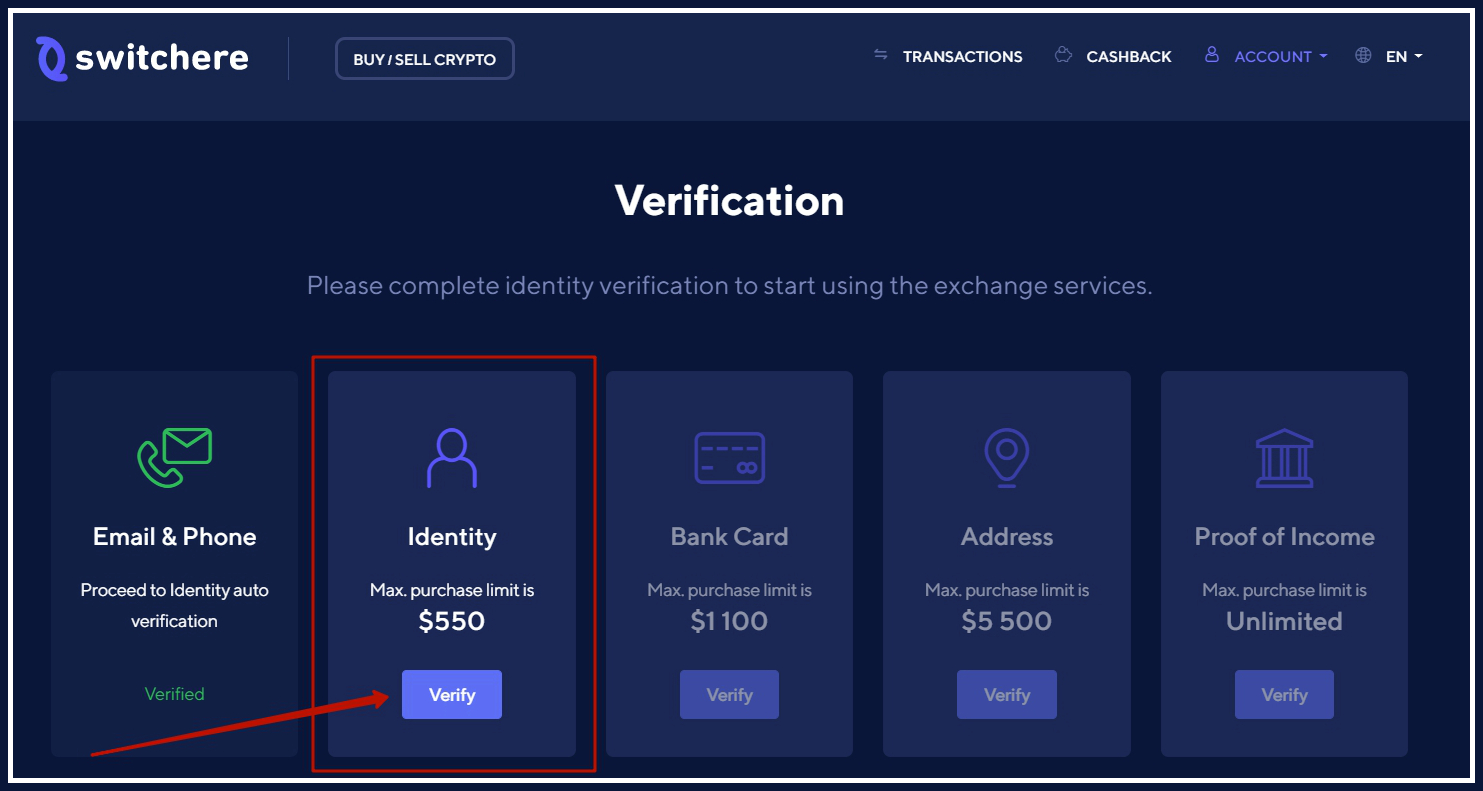
3. After entering the “Verification” page, press “Verify” button in Identity section.
Start
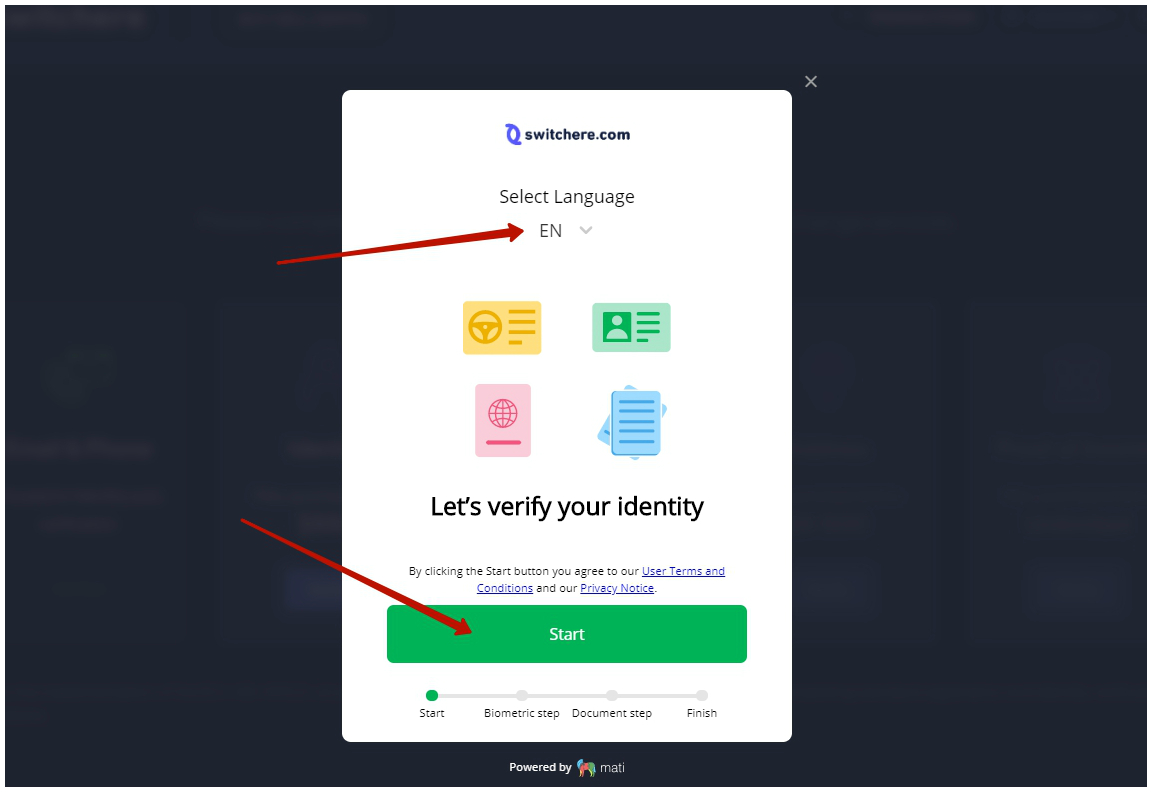
1. Let’s verify your identity! In the “Select language” list, you can choose the language you prefer. Make sure you’ve read the Terms & Conditions and Privacy policy carefully before clicking “Start”.
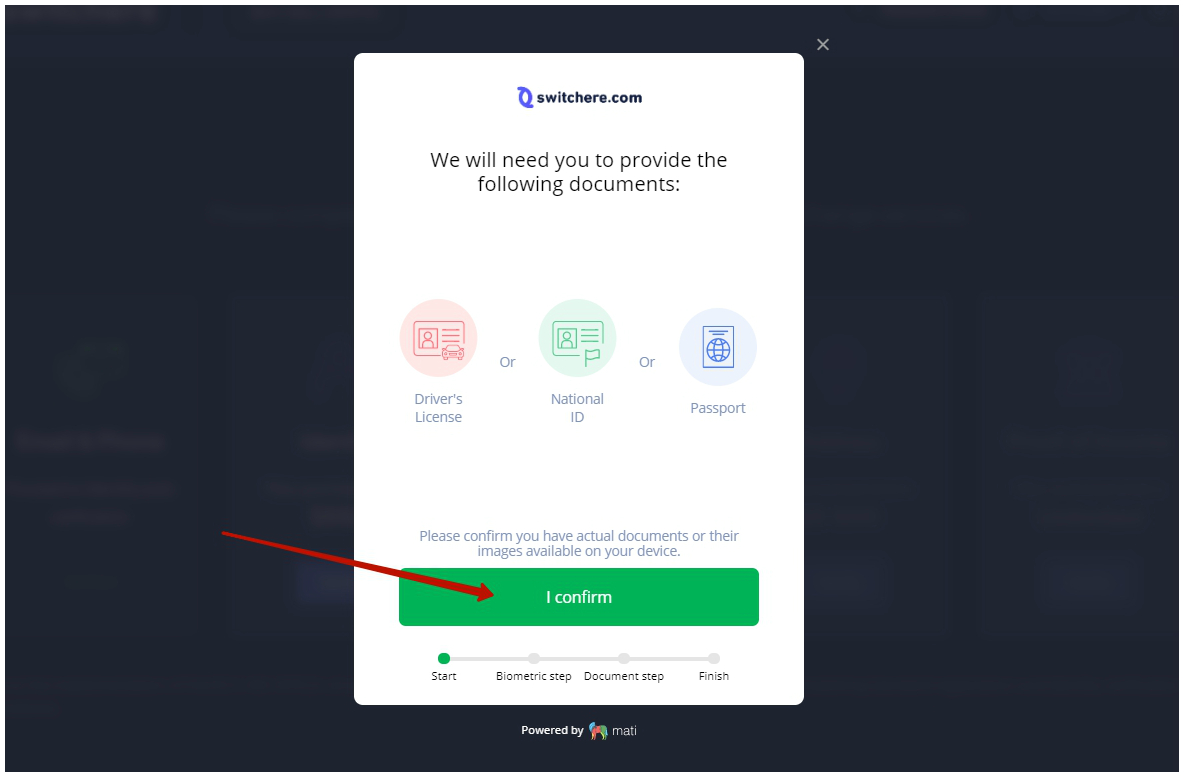
2. Just prepare all the necessary documents in advance (Driver’s License, National ID or Passport) and then click “I confirm”.
Biometric Step
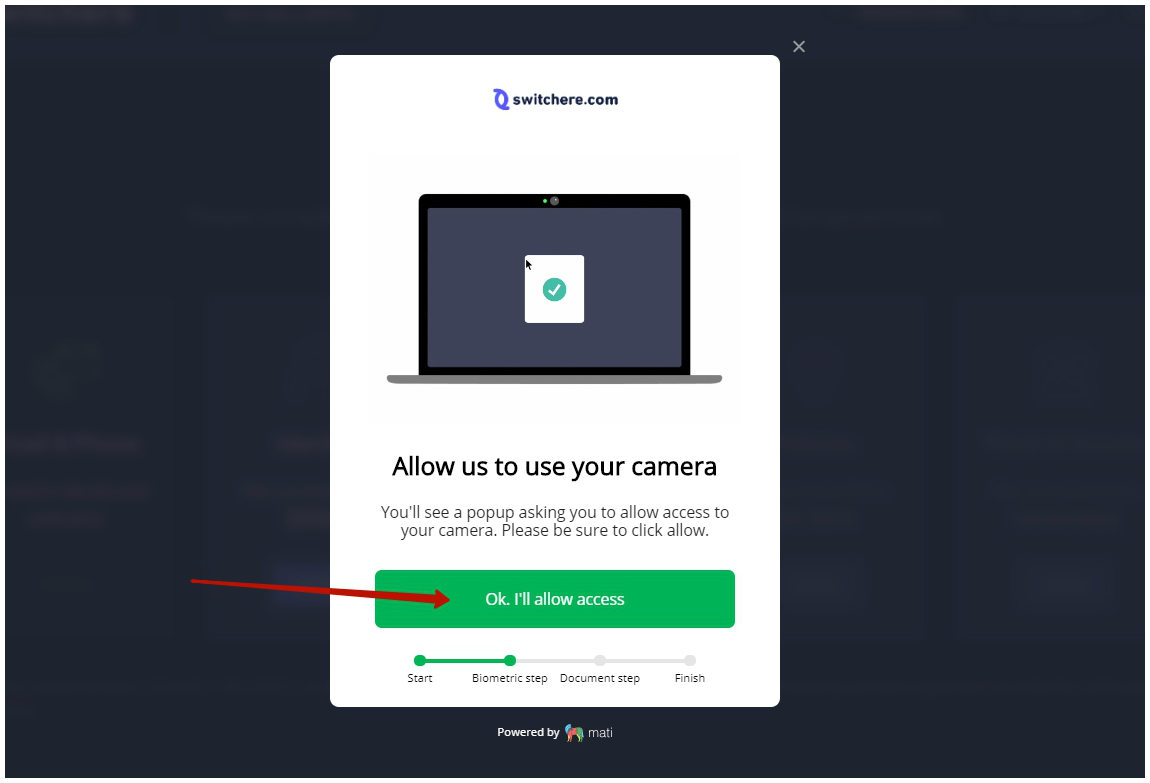
1. Allow us to use your camera by clicking “Ok. I’ll allow access“. In case you don’t have a webcam, you will be able to continue the verification process on your smartphone.
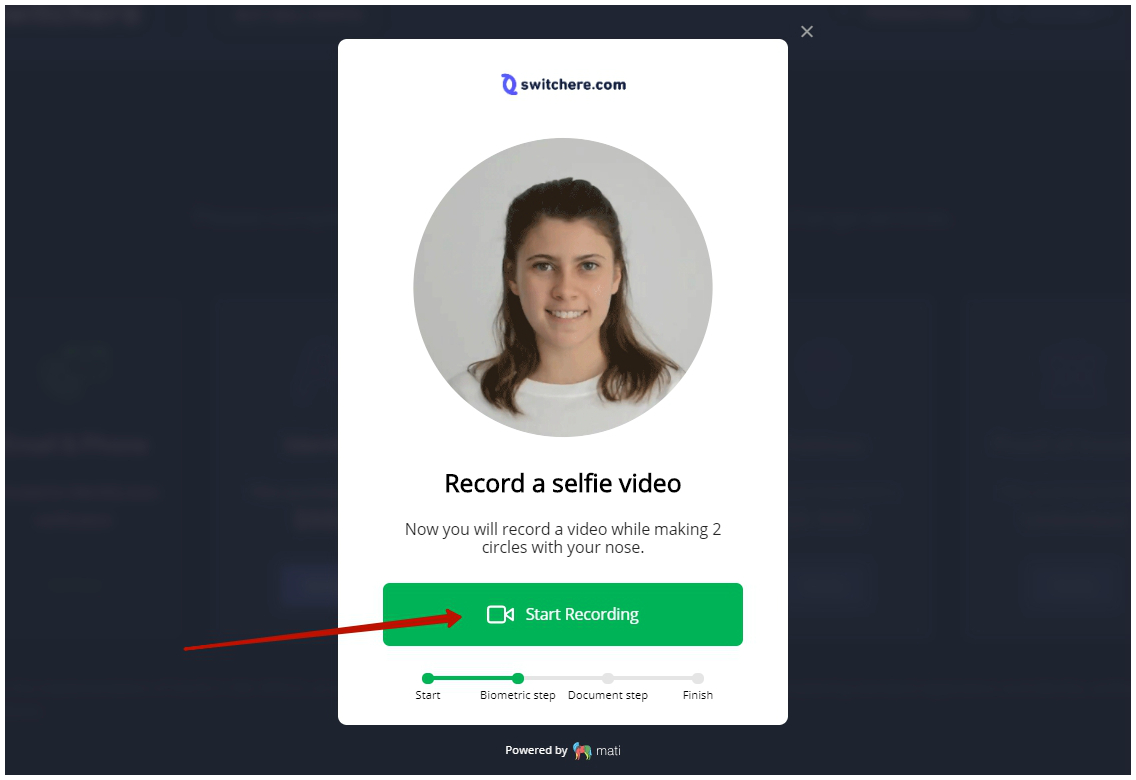
2. Make sure you’re ready to record a selfie video before clicking “Start Recording“.
Necessary steps:
• Please look straight into the camera.
• Please make two circles with your nose.
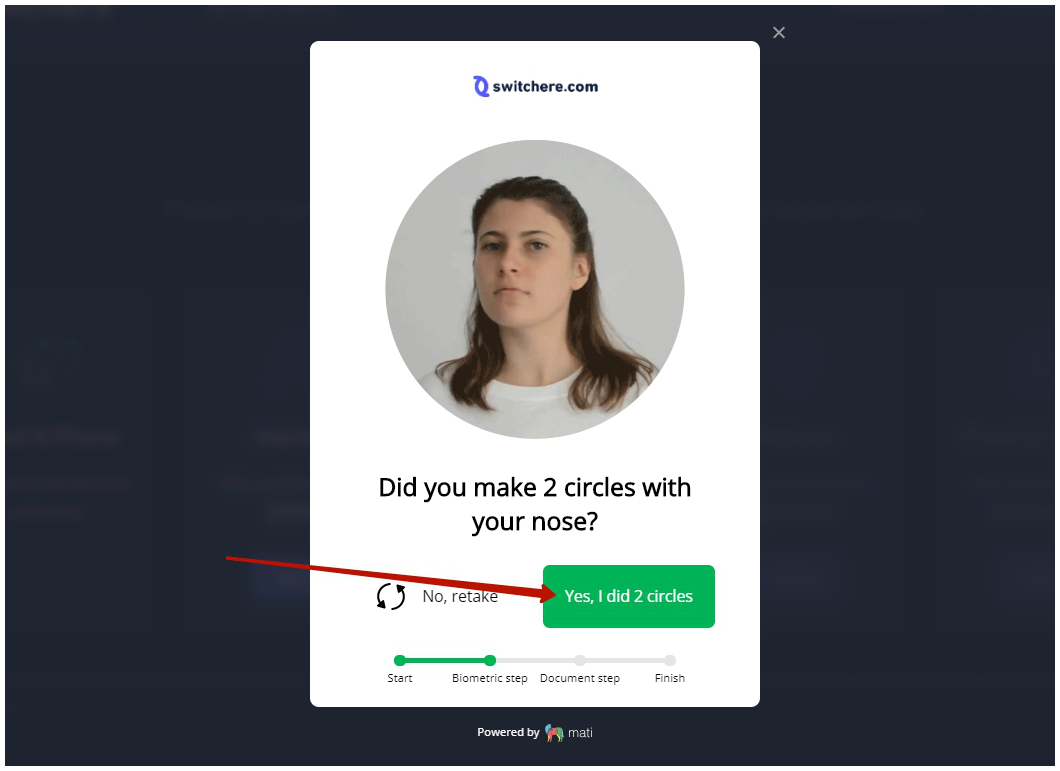
3. If you made two circles with your nose then press “Yes, I did 2 circles” button to continue.
Document Step
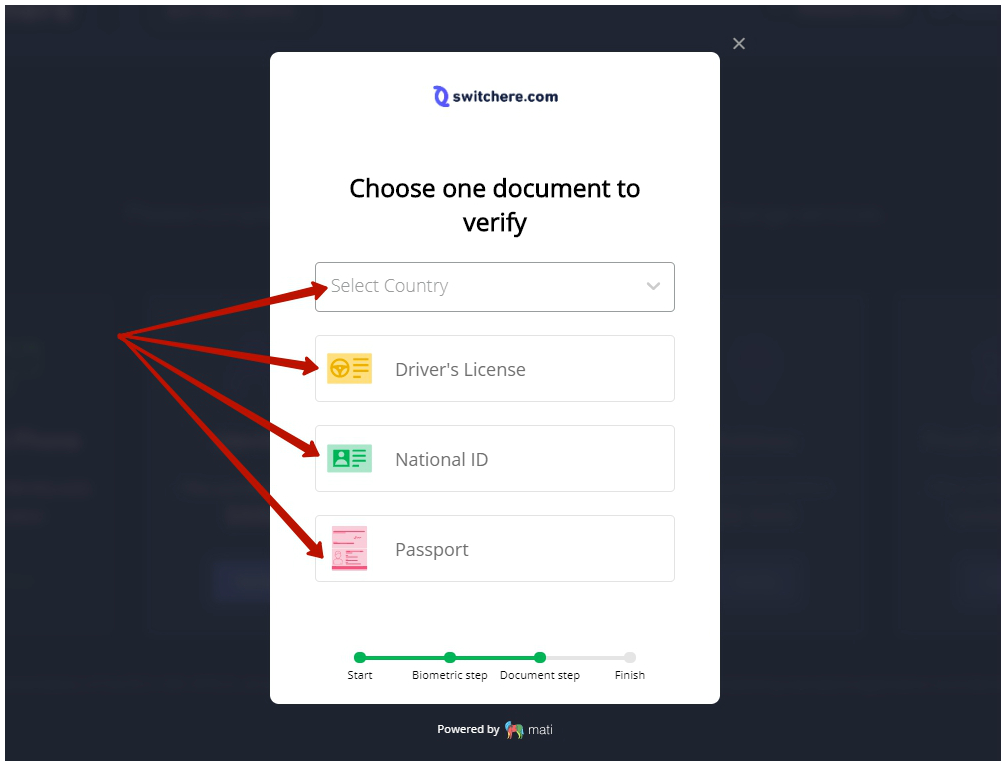
Choose your country of citizenship, and one document to verify from the list below (Driver’s License, National ID or Passport). Make sure the document chosen is valid and internationally recognized.
Useful tips:
• Please bring your document close to the camera but make sure that it’s fully visible.
• Please avoid reflections and flares on the document.
• Please make sure that your document is not blurry.
• Please don’t cover any parts of the document.
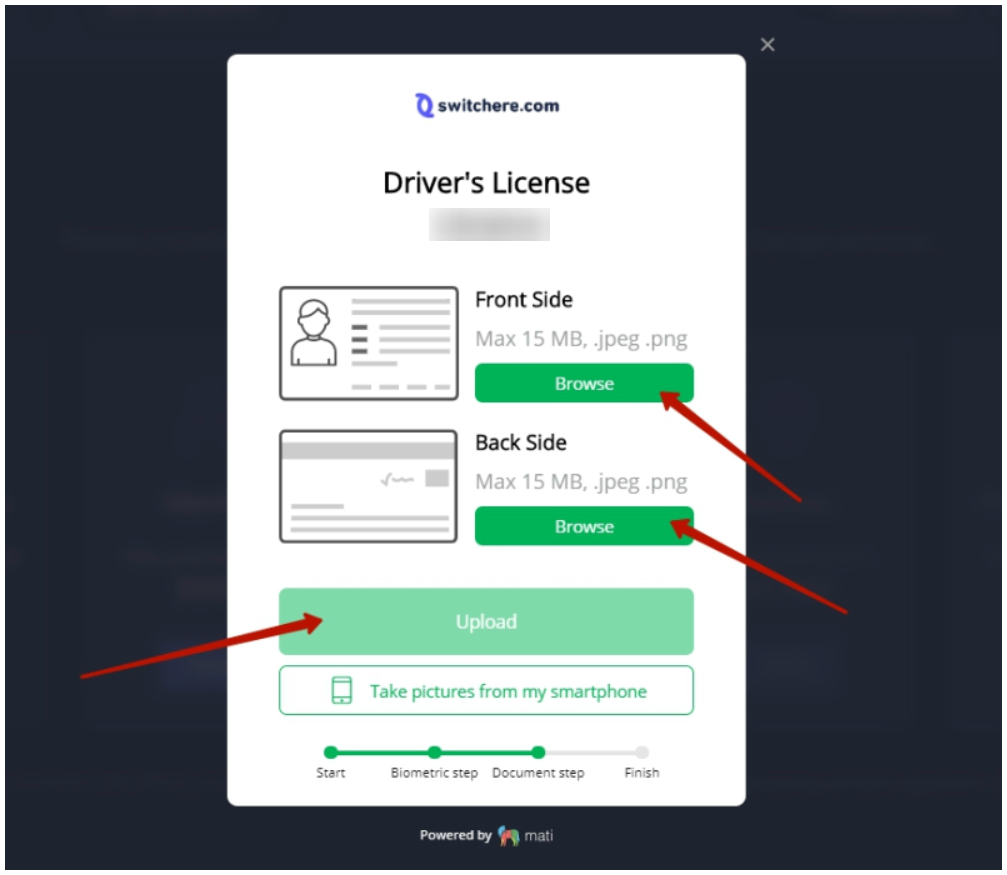
Driver’s License
Browse the photos of your Driver’s License’s front side and back side. Press the “Upload” button.
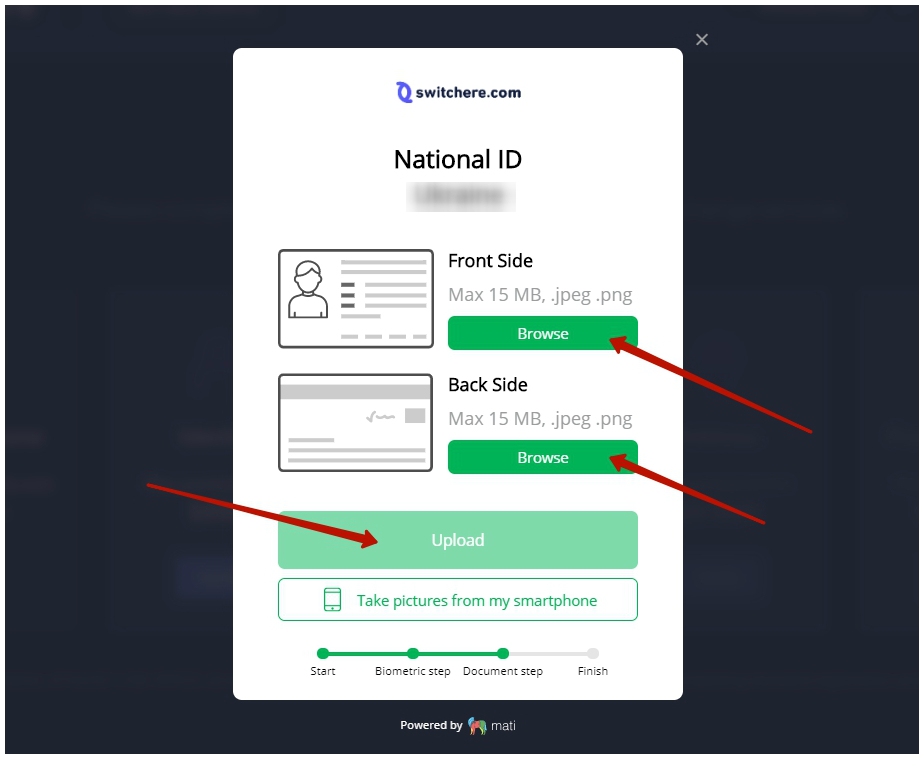
National ID
Browse the photos of your National ID’s front side and back side. Press the “Upload” button.
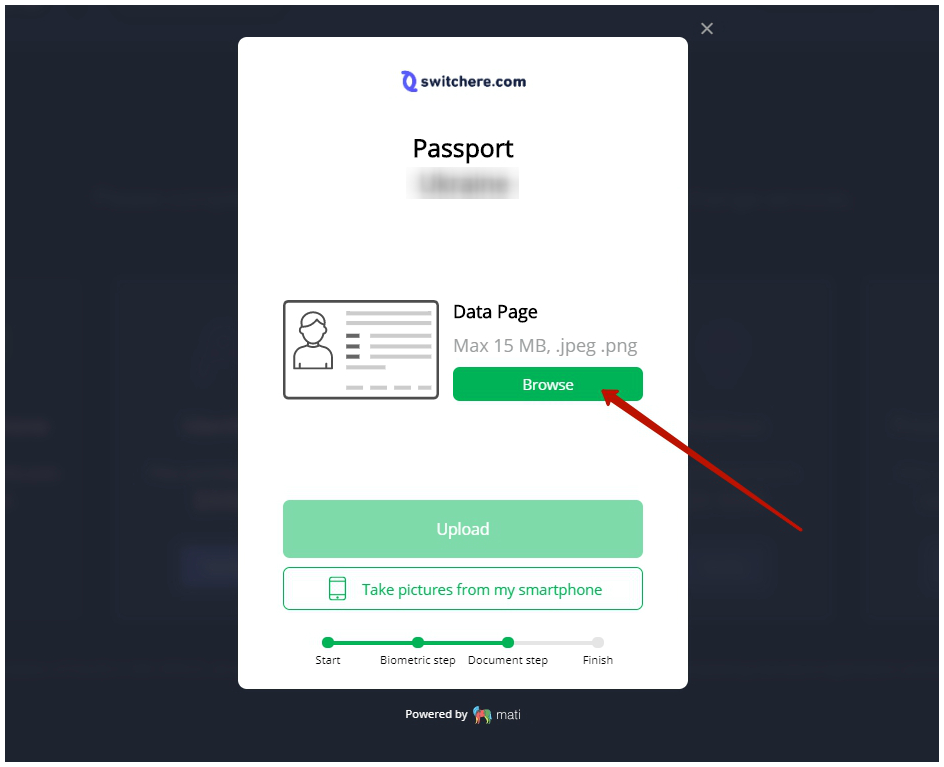
Passport
Browse the photos of your Passport’s data page. Press the “Upload” button.
Additional Options
Here we are talking about the “Take pictures from my smartphone” button, which appears during uploading photos process.
Switchere allows its users to use their smartphones during verification. So, in case you don’t have the required documents on your computer you can upload them from your smartphone.
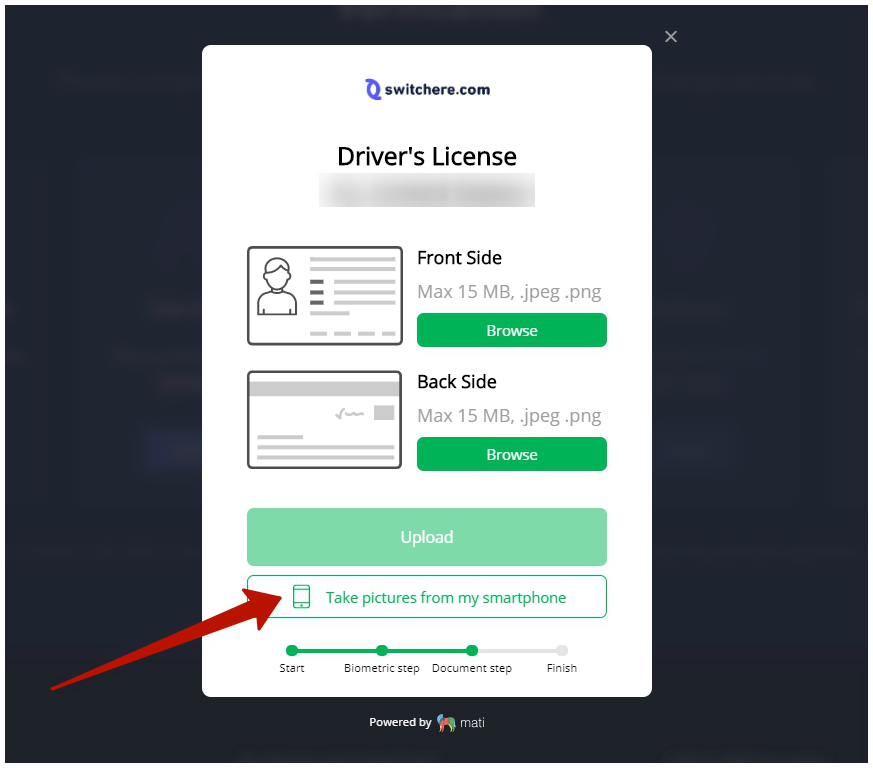
After clicking the “Take pictures from my smartphone” button you have to choose how you want to get the link on your smartphone (QR Code or E-mail).
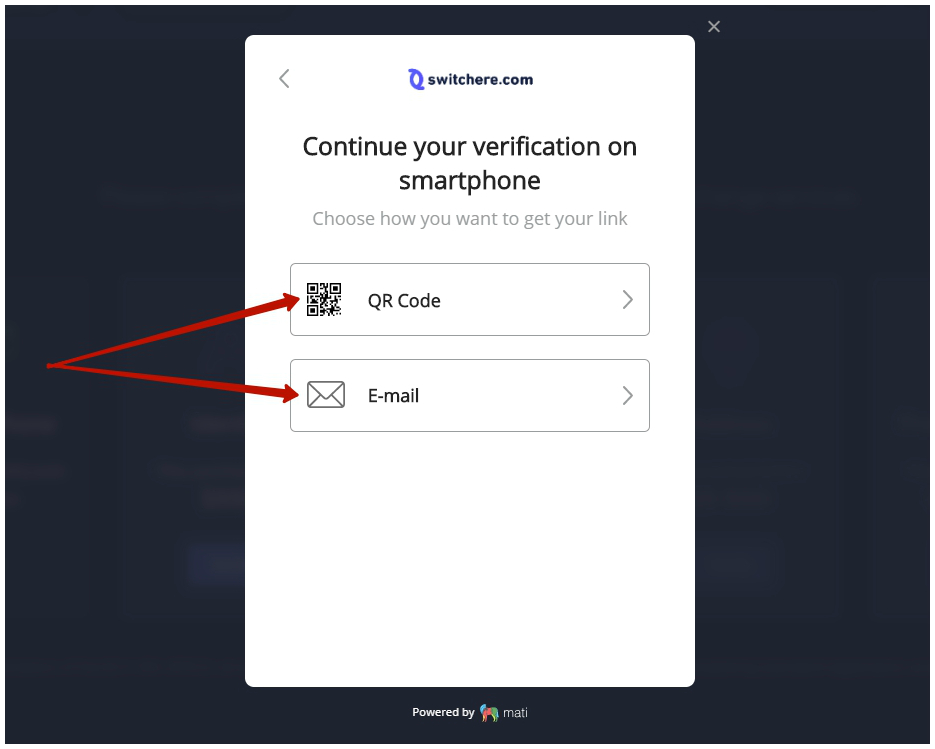
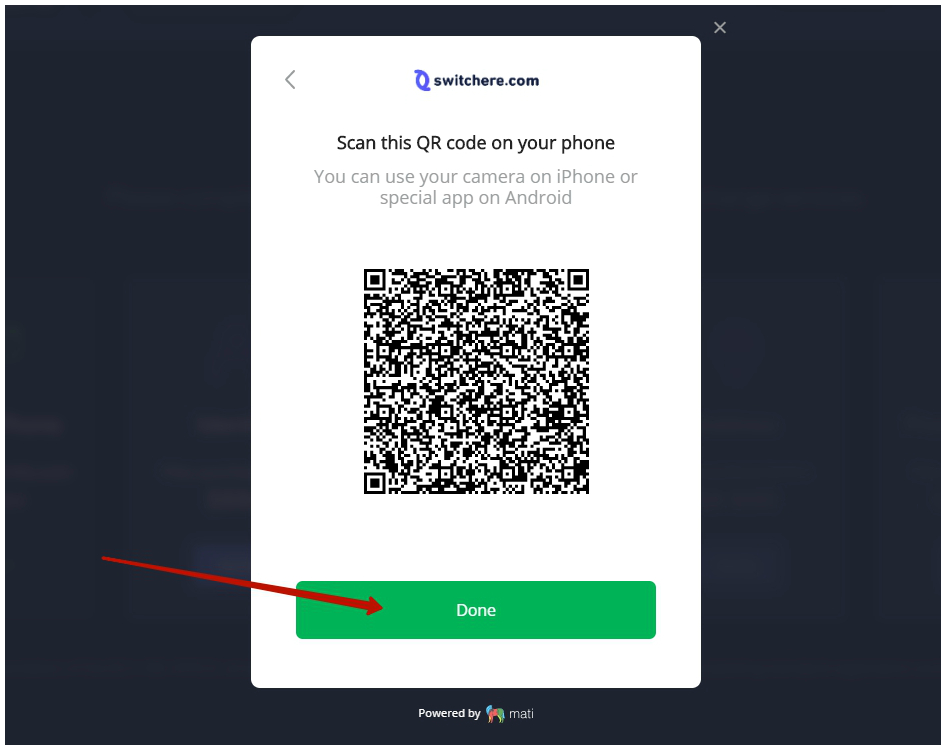
Once you choose the QR Code option, you’ll see the QR code on your screen. Scan it with your smartphone.
Then, you’ll see a link to the verification step for uploading photos. Open this link in your mobile browser and upload your photos. Once you finish, don’t forget to click “Done” on your computer screen.
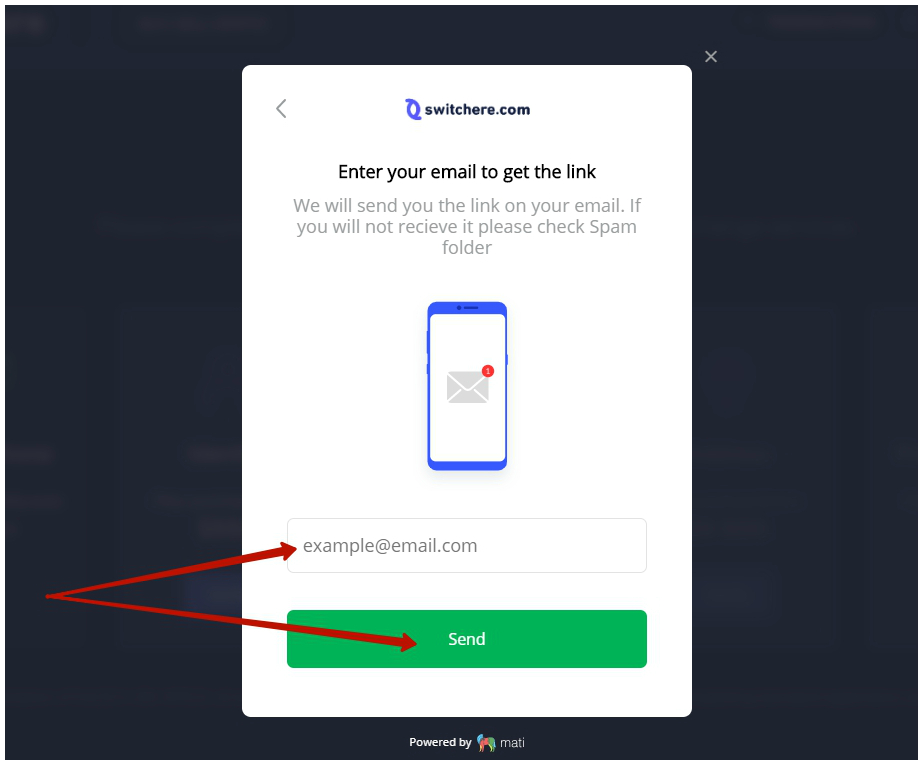
In case you’ve chosen the E-mail option, you have to enter your valid email address, on which we will send you the link.
Once you receive it, open this link in your mobile browser and upload your verification photos. Don’t forget to click “Done” on your computer screen to continue.
Finish
Done! You’ve submitted your application for Identity verification on Switchere.
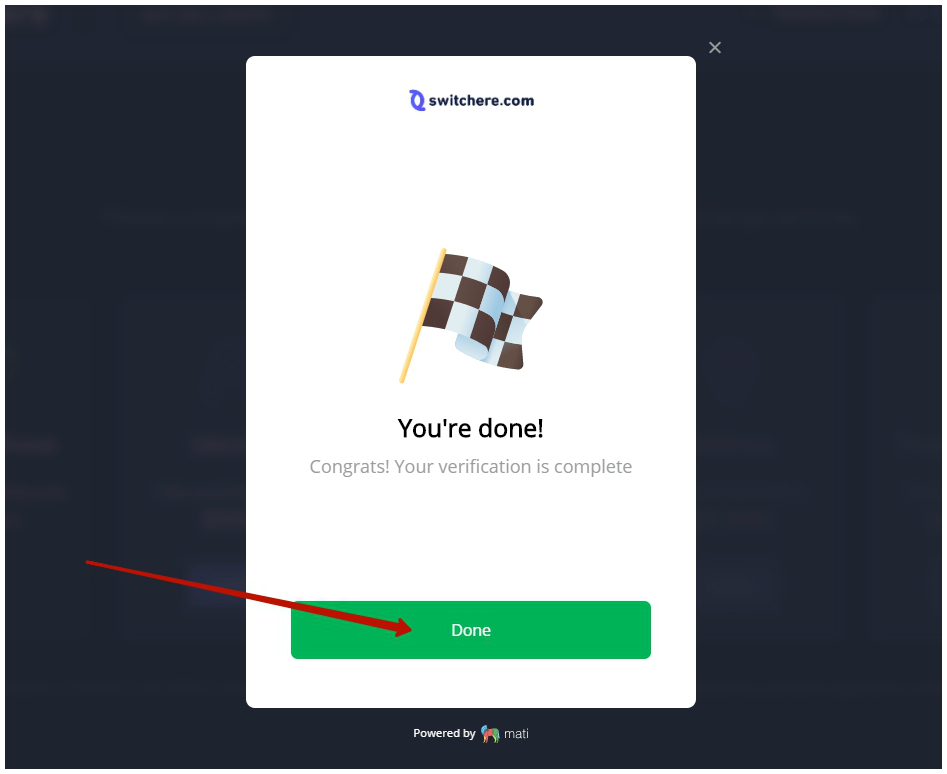
Now your identity verification is in progress. If you’ve submitted everything correctly, your verification data will be confirmed within 15 minutes. You can monitor the status of your application on the Verification page.
If you have any troubles with the identity verification process, let us know at [email protected].
Leave a Reply